| Goal |
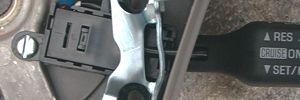
Attach the cruise control switch to cowl and steering wheel.
|
| Step 1 |
Double check your parts against the parts list. Go to the hardware store
and exchange the wrong parts you bought for the right ones. For example,
do you really have a self-tapping machine screw? Or do you have a
self-tapping sheet-metal screw? The machine screw has finer threads
and is what you really want! |
| Step 2 |
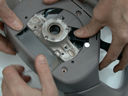
Turn the steering wheel right side up. Note that the mounting hole on
the rear edge of the cruise control switch lines up with a hole in the steering
wheel metal frame near the center. That hole isn't threaded. Use the self-tapping
machine screw to thread it: Carefully start it very straight and screw it
directly into the frame by hand. Screw it all the way, then unscrew it.
You'll use it later to fasten the switch in place.
|
| Step 3 |
|
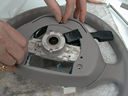
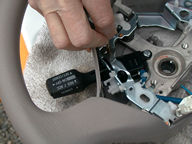
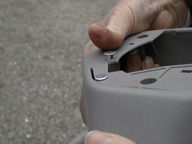
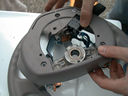
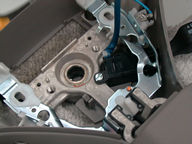
Place the cruise control switch through the D shaped hole in the
cowl. Then replace the cowl back on the steering wheel. Don't replace
the copper horn contacts that you removed in step 4 of previous
page. This is just a dry run. Replace the three screws that hold
the cowl on.
Notice that the rear mounting tab on the switch fits on top of
the frame near the central hole. Screw the self tapping screw through
the mounting tab into the hole you tapped in step 2. Don't screw
this all the way down yet.
|
|
|
|
|
| Step 4 |
|
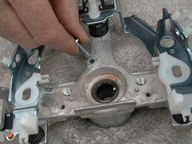
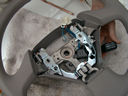
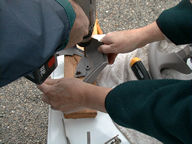
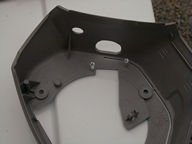
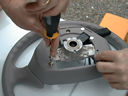
Using a nail or a small drill bit, make a mark through the other
two plastic flanges with mounting holes on the cruise control switch,
into the cowl plastic below. You will use these marks for drilling
in step 7.
|
|
|
| Step 5 |
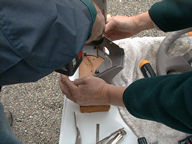
Check the size of the other two cut outs. Supporting the switch by hand,
operate the switch all three ways that it can move: up, down and towards
you. Note any adjustments you'll need to make to the holes. |
| Step 6 |
Unscrew the switch. Flip the steering wheel upside down again and remove
the three screws holding on the cowl. Disassemble the cowl and switch and
remove them from the steering wheel. If you noted any adjustments to the
holes in step 5, now is the time to make them, and re-check the fit. Careful
here, we actually over-did ours a bit at this point. |
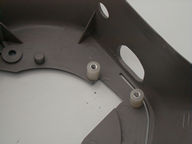
| Step 7 |
|
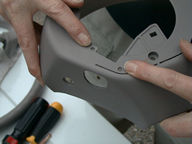
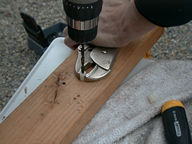
Drill the two holes for the screw posts at the marks you made in
step 4. You want these tight, so use a drill bit a little smaller
than the screw posts: 3/16" or 13/64". Then wiggle the
drill around a bit to make the hole big enough until you can just
push the screw posts through. They should fit snugly.
|
|
|
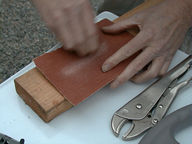
| Step 8 |
Modify the two nylon stand-offs. The center hole must be big enough to
fit over the screw posts (doesn't matter if it is tight or not). We used
a 13/64" drill bit to drill out the center of each nylon standoff.
The standoffs should be 1cm long. Err on the longer side, and use sandpaper
to trim off the excess and make the faces flat. If they are too short, the
switch won't be held tightly in place. If you make it too short, cut a new
one. (At 15 cents a piece, they're cheap .)
|
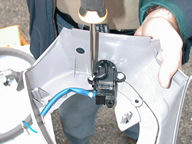
| Step 9 |
|
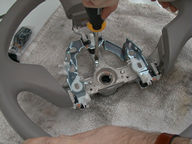
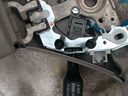
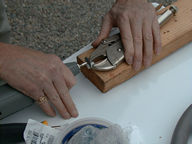
Assemble the switch into the cowl: Slip the nylon standoffs over
the screw-post shafts. Position the cruise control switch with the
stalk through the D hole, and the two side mounting flanges on the
stand-off shafts. Screw the two screws (that came with the screw-posts)
into the screw-posts, fastening the switch to the cowl. You will
have to hold the back of the screw posts with finger pressure to
keep them from turning while you tighten down the screws.
Note: This picture of the standoffs was taken before we has trimmed
them down to 1cm. The screw-posts will actually protrude above the
standoffs a little bit.
|
|
|
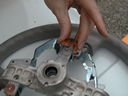
| Step 10 |
|
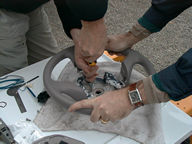
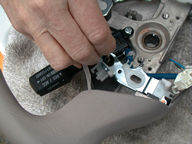
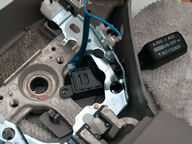
Put the three copper horn contacts back into place
Put the cowl back on the steering wheel. Note that the cruise control
switch's rear mounting tab has to be on the front side of the metal
frame, while the cowl is being placed on the back. This takes a
bit of maneuvering, and it is easy to knock the horn contacts out
of place. Extra hands help.
Replace the three screws that hold the cowl on, this time for good.
|
|
|
| Step 11 |
|
Flip the steering wheel over and screw the self-tapping screw into
the cruise control switch rear mounting hole.
|
|
|
| Done |
Steering wheel modifications are now complete. |